Achieve a Cat-Eye: 3 Easy Steps for Beginners [2025 Guide]
![Achieve a Cat-Eye: 3 Easy Steps for Beginners [2025 Guide]](https://buyy-bye.com/wp-content/uploads/2025/05/Buyy-Bye_4_1748517554_f57e1ecb_cover.jpg)
Achieve a Cat-Eye in 3 Easy Steps: A Beginner’s Guide for 2025 provides a simple, effective approach for mastering this iconic eye makeup look, detailing essential tools, precise application techniques, and expert tips for a flawless finish suitable for any eye shape.
Want to master the classic cat-eye look? Our Achieve a Cat-Eye in 3 Easy Steps: A Beginner’s Guide for 2025 will simplify the process, making it achievable for anyone.
The Allure of the Cat-Eye: Why It Remains a Classic
The cat-eye has transcended trends, remaining a steadfast symbol of glamour and sophistication. But why does this particular style hold such enduring appeal?
From vintage Hollywood to modern runways, the cat-eye’s versatility allows it to complement any era and personal style. It’s a statement look that can be adapted for everyday wear or a night out.
Historical Significance
The cat-eye look can be traced back to ancient Egypt, with figures like Cleopatra sporting similar winged eyeliner. Its modern resurgence began in the 1950s and 60s, popularized by icons like Audrey Hepburn and Elizabeth Taylor. This rich history contributes to the enduring allure of the cat-eye.
Modern Interpretations
Today, makeup artists and enthusiasts continue to reinvent the cat-eye. Variations include the classic wing, the double-winged look, and softer, smudged versions. This adaptability ensures the cat-eye remains relevant and appealing to diverse tastes.
- Confidence Booster: The cat-eye instantly elevates any look, adding a touch of sophistication.
- Versatile Style: Adaptable for both daytime and evening looks.
- Timeless Appeal: Transcends fleeting trends, remaining a classic.
Ultimately, the sustained popularity of the cat-eye hinges on its ability to empower the wearer, enhance natural beauty, and exude timeless elegance.
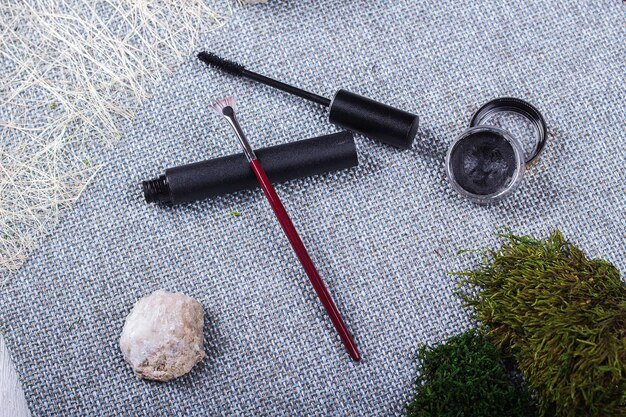
Step 1: Gather Your Essential Tools
Before diving in, having the right tools at your disposal is crucial. This ensures a smoother application process and a more professional-looking result.
Selecting high-quality products designed for precision can make all the difference, minimizing mistakes and maximizing impact.
Eyeliner Options
Choosing the right eyeliner is a matter of personal preference. Options include liquid liners for sharp, defined lines, gel liners for a smoother, more controlled application, and pencil liners for a softer, more forgiving look.
Consider your skill level and desired outcome when selecting your eyeliner.
Brush Selection
If you opt for a gel liner, a fine-tipped angled brush is essential for precise application. For liquid liners, make sure the brush is thin and firm for creating sharp lines.
Experiment with different brushes to find the one that best suits your technique.
- Liquid Liner: Ideal for sharp, defined wings.
- Gel Liner: Offers smooth, controlled application.
- Angled Brush: Necessary for gel liner application.
Investing in quality tools will significantly enhance your ability to achieve the perfect cat-eye, transforming a potentially daunting task into an enjoyable and rewarding one.
Step 2: Mastering the Application Technique
The application technique is where practice and patience come into play. Breaking the process into manageable steps can make it less intimidating.
Focus on creating a gradual build-up of the line, allowing for corrections and adjustments along the way.
Start with a Dot
Before drawing the full line, start by placing a small dot where you want the wing to end. This serves as a guide and helps ensure symmetry on both eyes.
Adjust the dot’s position until you’re satisfied with the angle and length.
Connect the Dot
Using your chosen eyeliner, gently draw a line from the outer corner of your eye to the dot. Use small, feather-light strokes to avoid creating a thick, uneven line.
Take your time and focus on creating a smooth, continuous line.
Fill It In
Once you have the basic wing shape, fill in the space between the wing and your upper lash line. Make sure the line is even and consistent in thickness.
Add more layers to darken the line if desired.
- Use Short Strokes: Create a smooth line with small, controlled strokes.
- Keep Elbow Steady: Rest your elbow on a table for stability.
- Practice Makes Perfect: Don’t be discouraged by early attempts.
With consistent practice, you’ll develop a technique that works best for your eye shape, transforming you into a cat-eye pro.
Step 3: Refining and Perfecting Your Cat-Eye
Even with careful application, minor imperfections can occur. The refinement stage involves cleaning up any mistakes and ensuring a polished finish.
Having the right tools for touch-ups is essential for achieving a flawless cat-eye.
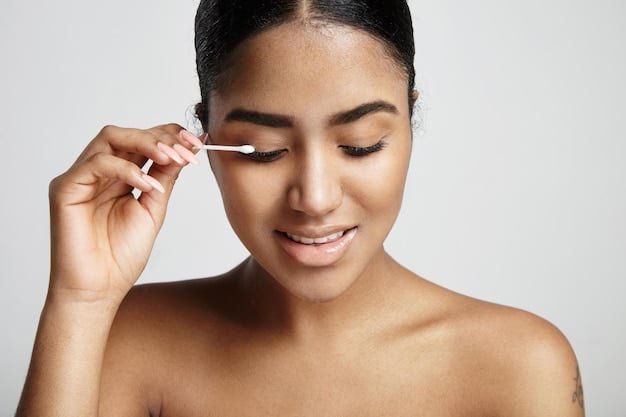
Clean Up with Precision
Use a pointed cotton swab dipped in makeup remover to gently clean up any smudges or uneven lines. A clean, sharp line is key to a professional look.
Avoid pulling or stretching the skin around your eyes.
Balance and Symmetry
Carefully compare both eyes to ensure they are symmetrical. Adjust the angle and thickness of the wings as needed to achieve balance.
Small differences are natural but aim for overall symmetry.
Setting the Look
To prevent smudging, especially on oily eyelids, set your eyeliner with a light dusting of translucent powder. This will help keep your cat-eye looking fresh all day or night.
Choose a powder that won’t alter the color of your eyeliner.
- Concealer: Use concealer to sharpen the wing for extra definition.
- Makeup Remover Wipes: Convenient for quick touch-ups.
- Mirror Placement: Use a magnifying mirror in a well-lit area.
Mastering these refinement techniques will ensure your cat-eye is not only striking but also flawlessly executed, boosting your confidence.
Adapting the Cat-Eye for Different Eye Shapes
While the basic cat-eye technique remains the same, slight adjustments can enhance the look for various eye shapes. Understanding your unique features is key to achieving the most flattering result.
Experimenting with different angles and thicknesses will help you discover what works best for you.
Hooded Eyes
For hooded eyes, where the eyelid covers the crease, create a thicker wing that is visible when the eyes are open. Opt for a waterproof formula to prevent transfer.
Draw the line slightly above the natural crease for better visibility.
Almond Eyes
Almond eyes are versatile and can pull off almost any cat-eye style. Experiment with different wing lengths and thicknesses, from subtle to dramatic.
Consider a classic, slightly upturned wing for a timeless look.
Round Eyes
To elongate round eyes, create a longer, more horizontal wing. Avoid flicking the wing too high, as this can make the eyes appear even rounder.
Extend the line slightly past the outer corner of the eye.
- Close-Set Eyes: Start the eyeliner slightly away from the inner corner.
- Wide-Set Eyes: Extend the eyeliner closer to the inner corner.
- Downturned Eyes: Create a more upturned wing to lift the eyes.
By tailoring the cat-eye to your specific eye shape, you can maximize its flattering effect, transforming it from a mere makeup technique to a powerful enhancement of your natural beauty.
Troubleshooting Common Cat-Eye Mistakes
Achieving a perfect cat-eye can be challenging, and mistakes are a natural part of the learning process. Understanding common pitfalls and how to correct them is essential for mastering the technique.
Addressing these issues proactively will boost your confidence and improve your results.
Uneven Wings
One of the most common challenges is achieving symmetrical wings. Use a cotton swab dipped in makeup remover to adjust each wing until they match. Starting with a dot as a guide can also help.
Patience and small adjustments are key to achieving symmetry.
Smudging
Smudging can occur due to oily eyelids or using a non-waterproof formula. Set your eyeliner with translucent powder and opt for waterproof products, especially in humid conditions.
Avoid touching your eyes throughout the day.
Thick, Uneven Lines
Creating thick, uneven lines often happens when applying too much pressure or using large strokes. Use short, light strokes and build the line gradually for better control.
A fine-tipped eyeliner brush can also help.
- Wobbly Lines: Rest your elbow on a table for stability.
- Crooked Wings: Use a straight edge, like a business card, as a guide.
- Too Dramatic: Opt for a thinner line and a less dramatic wing.
By addressing these common mistakes with the right techniques and tools, you can overcome the challenges of creating a flawless cat-eye, achieving professional-looking results every time.
Beyond the Basics: Exploring Advanced Cat-Eye Styles
Once you’ve mastered the classic cat-eye, consider experimenting with more advanced styles to express your creativity and personalize your look. The possibilities are endless.
Exploring different themes can add excitement to your makeup routine.
Double-Winged Cat-Eye
The double-winged cat-eye involves creating a second, smaller wing parallel to the first. This adds drama and dimension to the eyes.
Ensure the two wings are evenly spaced and symmetrical.
Smudged Cat-Eye
For a softer, more relaxed look, try a smudged cat-eye. Use a pencil liner and gently smudge the line with a brush or your finger.
This style is perfect for a casual, everyday look.
Colorful Cat-Eye
Experiment with colored eyeliners to add a pop of vibrancy to your cat-eye. Blue, green, and purple are popular choices.
Coordinate the color with your outfit or eye color.
- Glitter Cat-Eye: Add glitter eyeliner for a festive touch.
- Graphic Cat-Eye: Create bold, geometric shapes with your eyeliner.
- Reverse Cat-Eye: Line the lower lash line instead of the upper.
By venturing beyond the basics and exploring these advanced styles, you can unlock the full potential of the cat-eye, transforming it into a versatile and expressive tool for self-expression.
| Key Point | Brief Description |
|---|---|
| 👁️ Essential Tools | Gather quality eyeliner, brushes, and makeup remover for precise application. |
| ✍️ Application Steps | Start with a dot, connect the line, and fill it in for a smooth cat-eye. |
| ✨ Refining Tips | Clean up edges, balance symmetry, and set with powder for a flawless finish. |
| ✔️ Eye Shape Adaptations | Adjust thickness and angles for hooded, almond, or round eyes to enhance natural features. |
FAQ
▼
Gel eyeliner pots paired with a fine, angled brush are often recommended for beginners. They offer more control compared to liquid liners, making it easier to create a precise line. Pencil liners are even more forgiving and suitable for softer looks.
▼
To enhance the longevity of your cat-eye, start with an eyeshadow primer on your eyelids. After applying the eyeliner, set it with a light dusting of translucent powder. Opt for waterproof or smudge-proof formulas, especially if you have oily eyelids.
▼
Mistakes are inevitable! Simply dip a pointed cotton swab in makeup remover and gently clean up any smudges or uneven lines. Take your time and don’t be afraid to start over if needed.
▼
The ideal angle for your cat-eye wing depends on your eye shape. A good starting point is to follow the natural angle of your lower lash line. Experiment with different angles to find what looks most flattering on you.
▼
Yes, you can definitely achieve a cat-eye with hooded eyes! The key is to create a thicker wing that is visible when your eyes are open. Use a waterproof formula to prevent transfer and draw the line slightly above your natural crease.
Conclusion
Mastering the cat-eye is a journey that combines the right tools, techniques, and a touch of patience. By following this Achieve a Cat-Eye in 3 Easy Steps: A Beginner’s Guide for 2025, you’ll be well on your way to creating this iconic look with confidence and flair, adaptable for any occasion and eye shape. Embrace the process, experiment with variations, and enjoy the transformative power of a perfectly executed cat-eye!


