How to Clean Your Makeup Brushes: A Step-by-Step Guide
Cleaning your makeup brushes is essential for preventing eye infections and extending their lifespan; regular cleaning removes bacteria, product buildup, and dead skin cells that can cause irritation and breakouts, and following a simple cleaning routine can keep your brushes in top condition for up to six months longer.
Maintaining clean makeup brushes is crucial for both your skin’s health and the longevity of your brushes; learning how to clean your makeup brushes: prevent eye infections and extend their lifespan by 6 months, is a simple way to protect your skin from harmful bacteria and ensure your makeup tools last longer.
Why Cleaning Your Makeup Brushes Matters
Cleaning your makeup brushes might seem like a chore, but it’s a vital step in your beauty routine; neglecting this task can lead to a host of skin issues and compromise the quality of your makeup application.
Regular cleaning prevents the buildup of bacteria, oils, and dead skin cells that accumulate on the bristles, directly impacting your skin health.
Preventing Bacteria Buildup
Makeup brushes are breeding grounds for bacteria if not cleaned regularly; this buildup can cause acne, skin irritation, and even eye infections.
Cleaning your brushes eliminates harmful microorganisms, creating a safer application process that protects your skin.
Extending Brush Lifespan
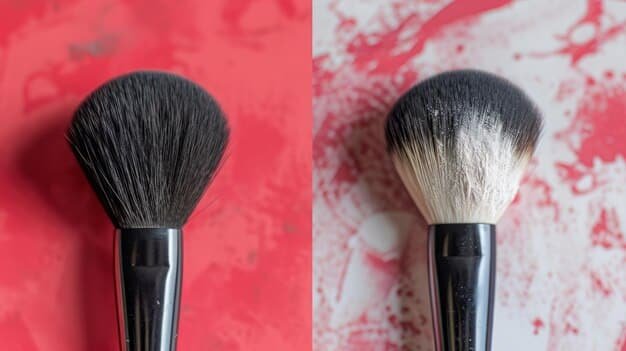
Product buildup can stiffen the bristles of your brushes, making them less effective and prone to damage; cleaning regularly helps maintain their softness and shape.
- Regular cleaning prevents the bristles from breaking or shedding.
- Clean brushes apply makeup more smoothly and evenly.
- Proper maintenance ensures your brushes last longer, saving you money in the long run.
In short, integrating regular brush cleaning into your routine prevents bacterial issues, keeps skin healthy, and increases tool longevity.
The Impact of Dirty Brushes on Your Skin
The consequences of using dirty makeup brushes extend beyond just a subpar makeup application; the health of your skin is directly at risk.
Understanding the potential harm can motivate you to prioritize brush cleaning and maintain better skincare habits.
Acne and Breakouts
Dirty brushes transfer bacteria and oils back onto your face, clogging pores and leading to acne and breakouts; these blemishes can be both painful and persistent.
Cleaning your brushes regularly removes these contaminants, helping to prevent acne flare-ups and maintain clearer skin.
Skin Irritation and Allergies
The accumulation of product and environmental pollutants on brushes can cause irritation and allergic reactions; sensitivities can develop over time due to repeated exposure to these irritants.
- Redness and itching can be symptoms of skin irritation.
- Dirty brushes can exacerbate existing skin conditions like eczema.
- Cleaning brushes removes potential allergens and irritants, reducing adverse reactions.
Regular cleaning mitigates the risk of skin irritation and allergies, ensuring a more comfortable and healthful makeup routine, preventing conditions like blepharitis.
Essential Tools and Products for Cleaning
To effectively clean your makeup brushes, you’ll need the right tools and products; having these essentials on hand makes the cleaning process easier and more efficient.
Choosing the right supplies ensures thorough cleaning without damaging your brushes, so opt for gentle, effective options.
Brush Cleaning Solutions
Specialized brush cleaning solutions are formulated to dissolve makeup residue and kill bacteria without harming the bristles; these solutions often contain conditioning agents that keep brushes soft.
Baby shampoo can be used as a gentle, cost-effective alternative for cleaning brushes; its mild formula cleanses without stripping the bristles of their natural oils.
Cleaning Mat and Tools
A silicone cleaning mat features textured surfaces that help dislodge makeup residue from the bristles; these mats make deep cleaning easier and more thorough.
- Cleaning eggs and gloves are smaller, portable options with similar textured surfaces.
- These tools help agitate the bristles and remove stubborn buildup.
- They are particularly useful for cleaning smaller, more delicate brushes.
Using effective tools ensures your brushes are thoroughly cleaned, helping to maintain their quality and effectiveness.
Step-by-Step Guide to Cleaning Your Brushes
Now that you have the essential tools, follow this step-by-step guide to properly clean your makeup brushes; consistent and correct cleaning ensures optimal hygiene and brush longevity.
These steps are designed to be simple and effective, so you can easily incorporate them into your regular routine.
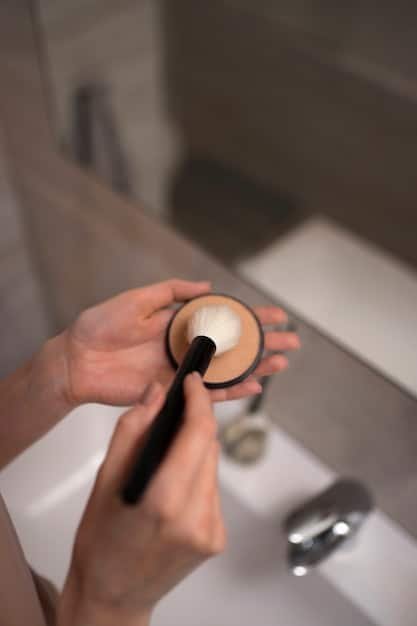
Rinsing the Bristles
Start by rinsing the bristles under lukewarm running water; be sure to avoid getting water into the base of the brush, as this can loosen the glue and cause shedding.
Rinse until the water runs clear, removing any loose product and debris.
Applying Cleaning Solution
Dispense a small amount of brush cleaning solution or baby shampoo into the palm of your hand; gently swirl the brush bristles in the solution, working up a lather.
- Use circular motions on a cleaning mat or in your palm to dislodge makeup residue.
- Focus on the areas where product buildup is most visible.
- Rinse the brush thoroughly under running water until all traces of soap are gone.
Proper rinsing and lathering is very important to remove contaminants, protect the brush, and prevent adverse skin reactions to soap.
Drying and Storing Your Clean Brushes
Proper drying and storage are crucial steps in maintaining the cleanliness and shape of your makeup brushes; incorrect drying can lead to mold growth and damage the bristles.
Follow these guidelines to ensure your brushes stay clean, dry, and ready for use.
Drying Techniques
Reshape the bristles after rinsing and gently squeeze out any excess water with a clean towel; lay the brushes flat on a dry towel to air dry, ensuring the bristles hang slightly off the edge of the surface to allow for proper airflow.
Brush trees or drying racks are designed to hold brushes upside down, preventing water from seeping into the base and loosening the glue.
Storage Solutions
Store your clean, dry brushes in a cool, dry place, away from direct sunlight and moisture; keeping brushes in a drawer or container can protect them from dust and debris.
- Brush holders can keep your brushes organized and accessible on your vanity.
- Consider using individual brush sleeves to prevent bristles from splaying or rubbing against each other.
- Avoid storing brushes in humid environments, such as bathrooms, as this can promote mold growth.
Prioritizing these drying and storage methods maintains brush quality and prolongs lifespan.
How Often Should You Clean Your Brushes?
Determining the right frequency for cleaning your makeup brushes depends on several factors, including how often you use them and the types of products you apply; a consistent cleaning schedule is essential to prevent bacterial buildup and maintain healthy skin.
Consider your usage habits and adopt a routine that ensures your brushes are always clean and ready for use.
Daily vs. Weekly Cleaning
Brushes used for liquid or cream products should be cleaned more frequently, ideally after each use or at least every few days; these products create a moist environment that encourages bacterial growth.
Brushes used for powder products can be cleaned less frequently, typically once a week; however, if you have acne-prone or sensitive skin, consider cleaning them more often.
- Makeup sponges and applicators should be cleaned after each use, as they absorb more product and harbor more bacteria.
- Assess the condition of your brushes regularly and adjust your cleaning schedule as needed.
- Proper cleaning frequency will optimize sanitation and beauty tool effectiveness.
Assessing usage, material, and skin sensitivities will all impact the ideal cleaning frequency for makeup brushes.
| Key Point | Brief Description |
|---|---|
| 🧼 Cleaning Frequency | Liquid brushes need more frequent cleaning than powder brushes. |
| 🧴 Cleaning Solutions | Use gentle brush cleaners or baby shampoo for effective cleaning. |
| 💧 Drying Method | Dry brushes upside down or on their side to prevent glue damage. |
| 📅 Replacement Time | Replace brushes every 3-6 months, or when bristles fray. |
FAQ
▼
While regular soap can remove dirt, it may be too harsh for delicate brush bristles. Gentle brush cleaners or baby shampoo are better options as they cleanse without stripping natural oils.
▼
Natural hair brushes require gentler cleaning than synthetic brushes. Use mild solutions and avoid harsh scrubbing to maintain their softness and prevent damage. Synthetic brushes can handle more vigorous cleaning.
▼
The best method is to dry brushes horizontally or upside down to prevent water from seeping into the base and damaging the glue. Avoid direct sunlight or heat, which can distort the bristles.
▼
Replace makeup brushes every 3-6 months, or when you notice fraying, shedding, or discoloration. Regular replacement helps maintain hygiene and ensures a flawless makeup application.
▼
Yes, dirty makeup brushes can harbor bacteria that cause eye infections like conjunctivitis or styes. Regular cleaning is crucial to prevent these infections and protect your eye health.
Conclusion
In conclusion, mastering the art of how to clean your makeup brushes: prevent eye infections and extend their lifespan by 6 months requires a combination of appropriate tools, effective techniques, and consistent routines; by prioritizing the cleaning of your makeup brushes, you’re not only safeguarding your skin’s health but also ensuring the longevity and performance of your beloved beauty tools.


