False Eyelash Application: Your 2025 Beginner’s Guide

False eyelash application can seem daunting for beginners, but this comprehensive guide breaks down the process into easy-to-follow steps, ensuring you achieve a flawless look in 2025 with the right tools and techniques.
Ready to enhance your eye makeup with false eyelashes? The world of falsies can feel overwhelming, but this guide will demystify the application process. In this **False Eyelash Application: A Step-by-Step Guide for Beginners in 2025**, we’ll walk you through everything from choosing the right lashes to achieving a seamless, natural-looking finish.
Understanding False Eyelashes
Before diving into the art of application, it’s crucial to understand the basics of false eyelashes. This includes knowing the different types available and how they can transform your look.
Types of False Eyelashes
False eyelashes come in various materials, styles, and lengths. Understanding these differences is key to selecting the perfect pair for your desired look.
- Strip Lashes: These are applied along the entire lash line and are ideal for adding volume and length.
- Individual Lashes: Perfect for targeted enhancement, these allow you to fill in sparse areas or create a customized look.
- Magnetic Lashes: An alternative to glue, these lashes use magnets to attach above and below your natural lashes.
Choosing the Right Lashes for Your Eye Shape
Not all lashes are created equal, and the best choice depends on your eye shape. Consider these tips:
- Almond Eyes: Most lash styles will complement this versatile eye shape.
- Round Eyes: Opt for lashes that are longer in the center to elongate and define your eyes.
- Hooded Eyes: Choose lightweight lashes that won’t weigh down your eyelids.
By understanding the different types of lashes and selecting the ones that best suit your eye shape, you’re already one step closer to achieving a stunning look.
Gathering Your Supplies
Having the right tools is essential for a smooth and successful false eyelash application. This section outlines the necessary supplies you’ll need.
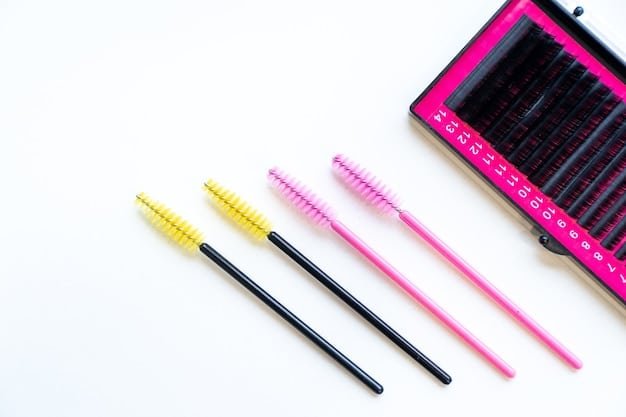
Essential Tools
Before you begin, gather these must-have tools for a professional-looking application:
- False Eyelashes: Choose your desired style and material.
- Eyelash Glue: Opt for a latex-free formula if you have sensitivities.
- Eyelash Applicator: This tool helps you position the lashes precisely.
- Scissors: For trimming the lashes to fit your eye shape.
- Mascara: To blend your natural lashes with the falsies.
Optional but Helpful Tools
While not strictly necessary, these tools can make the application process even easier:
- Eyelash Curler: To curl your natural lashes for a more seamless blend.
- Mirror: A magnifying mirror can provide better visibility.
- Cotton Swabs: For cleaning up any glue mishaps.
Gathering all your supplies beforehand will streamline the application process and minimize frustration.
Prepping Your Natural Lashes
Properly preparing your natural lashes is a crucial step for ensuring the false eyelashes adhere correctly and look their best. This involves cleaning and curling your lashes.
Cleaning Your Eyelids and Lashes
Start by ensuring your eyelids and natural lashes are clean and free of any makeup or oils. This will help the adhesive bond properly.
Use a gentle makeup remover or cleanser to remove any existing eye makeup. Follow with a cotton swab dipped in micellar water to cleanse your lash line.
Curling Your Natural Lashes
Curling your natural lashes will help them blend seamlessly with the false eyelashes. Use an eyelash curler before applying mascara.
Gently clamp the curler at the base of your lashes, holding for a few seconds. Repeat this process, moving the curler up the length of your lashes.
Applying Mascara
Applying a thin coat of mascara to your natural lashes before applying false lashes will help them to adhere more easily and blend in seamlessly. Avoid applying too much mascara, as this can make your natural lashes stiff.
By taking the time to properly prep your natural lashes, you’ll create a smooth canvas for the false eyelashes and ensure a more natural-looking result.
Applying False Eyelashes: A Step-by-Step Guide
Now that you’ve gathered your supplies and prepped your lashes, it’s time to apply the false eyelashes. Follow these step-by-step instructions for a flawless application.
Step 1: Measuring and Trimming the Lashes
Hold the strip lash up to your lash line to measure the length. If the lash is too long, trim it from the outer corner using small scissors.
Start by trimming a small amount and then measure again. Repeat until the lash fits your eye shape perfectly. Accurate trimming prevents the dreaded “droopy eye” look.
Step 2: Applying the Adhesive
Apply a thin, even layer of eyelash glue along the band of the false eyelash. Wait about 30 seconds for the glue to become tacky. This is crucial for proper adhesion.
Use a toothpick or the tip of the glue tube to spread the adhesive evenly. Avoid applying too much glue, as this can create a messy application of your **false eyelash application**.
Step 3: Positioning the Lashes
Using an eyelash applicator or your fingers, carefully position the false eyelash along your natural lash line, starting from the outer corner.
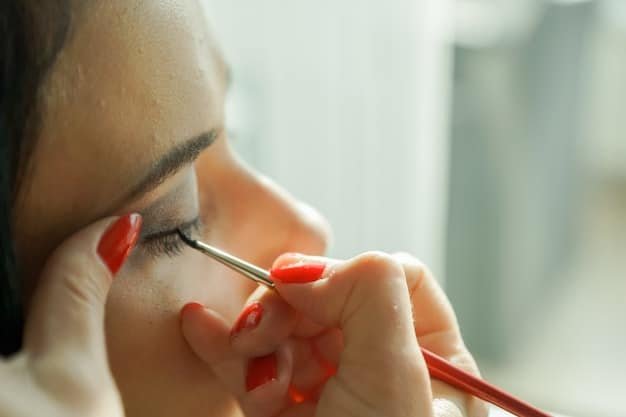
Gently press the lash band into your lash line, ensuring it’s securely attached at the inner and outer corners. Hold in place for a few seconds to allow the glue to dry.
Following these steps carefully will minimize mistakes and maximize the lifespan of your expertly applied false eyelashes.
Blending and Finishing Touches
Once the false eyelashes are securely attached, it’s time to blend them seamlessly with your natural lashes and complete your eye makeup look. This involves applying mascara and eyeliner.
Applying Mascara
Apply a coat of mascara to your natural lashes and the false eyelashes to blend them together. This will create a more cohesive and natural-looking effect.
Focus on the base of your lashes, wiggling the mascara wand back and forth. This will help to create volume and thickness.
Applying Eyeliner
Use eyeliner to fill in any gaps between the false eyelash band and your natural lash line. This will create a seamless and polished look.
Choose a liquid or gel eyeliner for precise application. Apply a thin line along your lash line, extending slightly beyond the outer corner of your eye.
Adjusting and Re-adhering
If necessary, use the lash applicator to gently adjust the position of the false lashes. If any spots become loose, carefully re-apply a small amount of glue to that area.
By carefully blending and refining your lash line, you’ll create a flawlessly finished look.
Caring for Your False Eyelashes
Proper maintenance ensures that your false eyelashes last longer and remain hygienic. This section covers cleaning and storing your lashes.
Removing the Lashes
Gently remove the false eyelashes by peeling them away from your lash line, starting from the outer corner. Avoid pulling or tugging, as this can damage your natural lashes.
Use a makeup remover to dissolve any remaining adhesive on your eyelids.
Cleaning the Lashes
Remove any mascara or glue residue from the false eyelashes using a cotton swab dipped in makeup remover. Be gentle to avoid damaging the lashes.
Allow the lashes to air dry completely before storing them.
Storing the Lashes
Store the false eyelashes in their original case to protect them from dust and damage. This will help them maintain their shape and prolong their lifespan.
Proper care and storage will save you money while always presenting your eyes at their finest.
| Key Point | Brief Description |
|---|---|
| ✨ Lash Selection | Choose lashes that suit your eye shape and desired look. |
| ✂️ Trimming | Measure and trim lashes for a perfect fit to prevent drooping.. |
| ✔️ Adhesive | Apply a thin layer of glue and wait until tacky before application. |
| 🧽 Cleaning | Gently clean lashes after each use to prolong their lifespan. |
FAQ
▼
Consider your eye shape. Almond eyes can wear almost any style, round eyes benefit from lashes longer in the center, and hooded eyes need lightweight lashes. The occasion also matters; natural for day, dramatic for night.
▼
Measure the lash against your eyelid. If it’s too long, trim it from the outer corner. Small, incremental trims are best to avoid over-cutting and ruining the shape of the lash.
▼
Normally, waiting for 30 seconds is recommended after applying the glue. Check the eyelash glue’s packaging instructions to verify the precise drying time, offering the best grip on your eyelid.
▼
Yes, false eyelashes can be reused if properly cared for. Gently remove glue and mascara after each use. Store them in their original case to maintain their shape and avoid any damage.
▼
Wearing false eyelashes every day is generally safe, but it’s important to allow your natural lashes to breathe occasionally. Always remove lashes gently and keep everything clean to prevent possible eye infections or irritation.
Conclusion
Mastering the art of **false eyelash application** opens a world of possibilities for enhancing your eye makeup. By following these step-by-step instructions and incorporating the tips provided, you can achieve a flawless and captivating look that enhances your natural beauty. Remember to practice patience and precision, and soon you’ll be rocking fabulous falsies with confidence!

![Achieve a Cat-Eye: 3 Easy Steps for Beginners [2025 Guide] - Cover Image](https://buyy-bye.com/wp-content/uploads/2025/05/Buyy-Bye_4_1748517554_f57e1ecb_cover-360x180.jpg "Achieve a Cat-Eye: 3 Easy Steps for Beginners [2025 Guide]")


