How to Apply Foundation with a Beauty Sponge: Flawless Finish Guide

Applying foundation with a beauty sponge is a popular technique for achieving a smooth, airbrushed finish; this step-by-step guide provides all the necessary information, from prepping your sponge to setting your makeup, for a flawless application in the US.
Want a flawless foundation finish? This guide shows you how to apply foundation with a beauty sponge for a perfect look, right here in the US.
What You’ll Need to Apply Foundation with a Beauty Sponge
Before diving into the application process, it’s essential to gather all the necessary tools and products. Having everything within reach will streamline your routine and ensure a smoother, more efficient makeup application. This prepares you for the perfect base.
Essential Tools and Products
A successful foundation application with a beauty sponge hinges on having the right tools. Here’s a quick rundown of what you need:
- Beauty Sponge: Choose a high-quality, latex-free sponge. A rounded sponge is versatile for all areas of the face.
- Foundation: Select a foundation that matches your skin type (e.g., dewy for dry skin, matte for oily skin).
- Primer: Applying a primer beforehand helps create a smooth canvas and prolongs the wear of your foundation.
- Setting Spray: Setting spray will lock in your makeup, preventing smudging and creasing.
With your supplies ready, you’re set to start achieving the flawless complexion you desire.
Step 1: Preparing Your Beauty Sponge
The key to a flawless application lies in properly preparing your beauty sponge. A dry sponge will absorb too much product, leading to a cakey finish. The ideal sponge should be damp, but not soaking wet.

How to Dampen Your Beauty Sponge:
- Run your beauty sponge under warm water until it’s fully saturated.
- Squeeze out the excess water. The sponge should be damp, not dripping.
- Use a clean towel or paper towel to blot away any remaining water.
A properly dampened sponge will allow your foundation to blend seamlessly into your skin, creating a natural, airbrushed effect. This step is crucial for avoiding a heavy, unnatural finish.
Step 2: Priming Your Skin
Priming your skin is a key step in any makeup routine, especially when aiming for a flawless foundation application. A good primer creates a smooth base, minimizes pores, and helps your makeup last longer. It also provides a barrier between your skin and the foundation.
Choosing the Right Primer:
- For dry skin: opt for a hydrating primer to add moisture and prevent foundation from clinging to dry patches.
- For oily skin: use a mattifying primer to control shine and reduce the appearance of pores.
- For sensitive skin: select a fragrance-free, hypoallergenic primer to avoid irritation.
Apply a small amount of primer to your fingertips and gently massage it onto your face, focusing on areas with visible pores or uneven texture. Allow the primer to absorb into your skin for a few minutes before moving on to the next step.
Step 3: Applying Foundation to the Sponge
There are several ways to apply foundation to your beauty sponge, each offering slightly different results. It’s essential to find the method that works best for you and your preferred foundation formula. Experiment with different techniques to discover what provides the most seamless, natural finish.
Methods for Application:
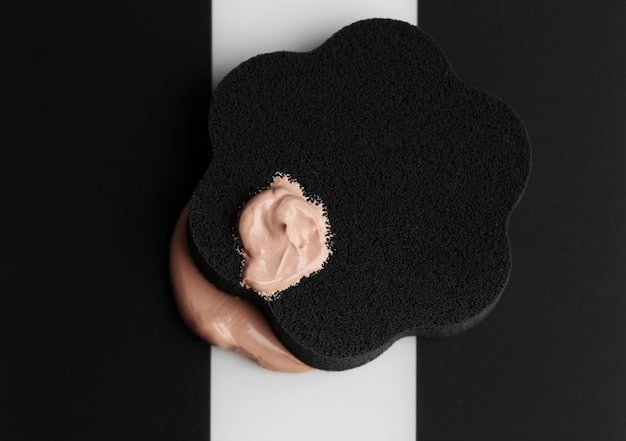
- Direct application: Apply a small amount of foundation directly onto the sponge, focusing on the rounded end. This method is ideal for building coverage in specific areas.
- Dotting method: Dot foundation onto your face, then use the sponge to blend it out. This technique allows for even distribution and prevents over-application.
- Palette method: Dispense foundation onto the back of your hand or a mixing palette, then dip the sponge into the product. This provides controlled application and minimizes wastage.
Regardless of the method you choose, remember to use a light hand and build coverage gradually. This prevents a heavy, cakey look and ensures a more natural, seamless finish.

Step 4: Bouncing and Blending
The key to achieving a flawless foundation finish with a beauty sponge is the bouncing and blending technique. Avoid dragging or swiping the sponge across your face, as this can create streaks and disrupt the product. Instead, use light, gentle bouncing motions to press the foundation into your skin.
Achieving the Perfect Blend:
- Start at the center of your face (forehead, nose, and chin) and work your way outwards.
- Use the rounded end of the sponge for larger areas and the pointed end for smaller, more delicate areas around the eyes and nose.
- Focus on blending the foundation seamlessly into your hairline and jawline to avoid harsh lines.
Continue bouncing and blending until the foundation is evenly distributed and seamlessly integrated into your skin. Take your time and pay attention to any areas that may require extra blending.
Step 5: Building Coverage
One of the greatest advantages of using a beauty sponge is the ability to build coverage gradually. Start with a thin layer of foundation and assess the areas that require more coverage. Use the same bouncing and blending technique to apply additional layers to these areas, ensuring a seamless, natural finish.
Addressing Problem Areas
For areas with blemishes, redness, or dark spots, use the pointed end of the sponge to stipple foundation directly onto the area. This provides targeted coverage without applying too much product to the surrounding skin.
Remember to blend the edges of the targeted area seamlessly into the rest of your foundation. The goal is to create a uniform complexion without any noticeable patches or unevenness. Patience and a light hand are key to achieving this flawless effect.
Step 6: Setting Your Foundation
Once you’ve achieved your desired foundation coverage, it’s crucial to set your makeup to prevent creasing, smudging, and fading throughout the day. Setting your foundation will ensure that it stays in place and keeps your complexion looking flawless for hours.
Choose Your Setting Method:
There are several ways to set your foundation, each with its own advantages and disadvantages. Here are two popular methods:
- Setting Powder: Lightly dust a translucent setting powder over your face using a large, fluffy brush. Focus on areas that tend to get oily, such as the T-zone.
- Setting Spray: Spritz a setting spray evenly over your face, holding the bottle about 8-10 inches away. Allow the spray to dry naturally without touching your face.
Experiment with both methods to determine which one works best for your skin type and preferences. Some people prefer the mattifying effect of setting powder, while others prefer the dewy finish of setting spray.
| Key Point | Brief Description |
|---|---|
| 💧 Damp Sponge | Essential for preventing product absorption and ensuring a smooth application. |
| ✨ Primer | Creates a smooth base, minimizes pores, and prolongs makeup wear. |
| 🖐️ Bouncing Technique | Use gentle bouncing motions to press foundation into the skin for an even blend. |
| ✅ Setting | Use powder or spray to prevent creasing and ensure long-lasting wear. |
FAQ
▼
You should replace your beauty sponge every 1-3 months, depending on how frequently you use it and how well you clean it. Regular cleaning helps extend its lifespan, but eventually, the sponge will degrade and need replacing.
▼
Yes, you can use a beauty sponge with powder foundation. Dampen the sponge slightly and dip it into the powder, then press and roll it onto your skin. This can help the powder adhere better to the skin.
▼
Clean your beauty sponge after each use with a mild soap or brush cleanser. Wet the sponge, apply the cleanser, and gently squeeze it to remove makeup residue. Rinse thoroughly and let it air dry.
▼
Both beauty sponges and brushes have their pros and cons. Sponges tend to provide a more airbrushed finish, while brushes can offer more coverage. It depends on your personal preference and the desired look.
▼
It’s not recommended to reuse a beauty sponge without cleaning it, as it can harbor bacteria and lead to skin problems. Always clean your sponge after each use to maintain hygiene and ensure optimal performance.
Conclusion
Mastering the art of applying foundation with a beauty sponge can truly transform your makeup routine, giving you that coveted flawless finish. By following these step-by-step instructions, you’ll be well on your way to creating a smooth, even complexion that looks naturally radiant. Experiment with different foundations and techniques to find what works best for your unique skin type and preferences, and remember that practice makes perfect!


