The Complete Guide to Baking Your Face: Achieve a Flawless, Airbrushed Look

Baking your face is a makeup technique that involves applying a thick layer of translucent powder to specific areas of the face, allowing it to sit and “bake” with the body heat, then dusting it away for a flawless, airbrushed finish.
Unlock the secret to a flawless, airbrushed complexion with our definitive guide to face baking. Master the technique of baking your face for a long-lasting, camera-ready finish that will leave you feeling confident and radiant.
What is Face Baking and Why is it Trending?
Face baking, a technique popularized by drag queens and makeup artists, has recently surged in popularity. But what exactly is it and why is everyone talking about it?
This involves allowing translucent powder to set on your face for a specific period, letting your body heat “bake” the product for optimal coverage and a smooth appearance.
The Origins of Baking
Baking originated in the drag community and backstage at photoshoots, where makeup needed to withstand harsh lighting and last for extended periods. Today, it’s a go-to method for achieving a flawless look.
Why is it Trending?
The rise of social media, particularly platforms such as Instagram and TikTok, has amplified the technique. Beauty influencers demonstrate how baking can minimize pores, brighten the under-eye area, and create a long-lasting matte finish.
- Provides a flawless, airbrushed finish.
- Helps to brighten the under-eye area.
- Increases the longevity of your makeup.
- Minimizes the appearance of pores and fine lines.
Ultimately, face baking offers a strategic way to enhance your makeup’s performance, making it a must-try for anyone seeking a polished and long-lasting appearance.
Essential Products for Baking Your Face
To successfully bake your face, having the right products is crucial. These essentials will ensure a smooth application and a flawless, long-lasting finish.
Here’s a breakdown of the key products you’ll need to get started.

Hydrating Moisturizer
A well-moisturized base is essential for preventing the skin from drying out under the heavy layer of powder. Choose a formula that suits your skin type.
Creamy Concealer
Select a concealer that is one to two shades lighter than your skin tone. This will brighten the areas you are baking, such as the under-eye and the center of your forehead.
Having the right products is only half the battle. Knowing how to use them correctly will ensure a seamless and stunning baked finish.
- Hydrating Moisturizer: Prepares and protects the skin.
- Creamy Concealer: Brightens and covers imperfections.
- Translucent Setting Powder: Sets the concealer and absorbs oil.
- Makeup Sponge or Brush: For precise application.
By investing in these high-quality products, you set the stage for a successful and stunning baked makeup look.
Step-by-Step Guide to Baking Your Face
Baking your face may seem intimidating, but with a step-by-step guide, it can be easily mastered. Follow these instructions for a flawless, airbrushed finish.
Let’s break down the process into manageable steps.
Step 1: Prep Your Skin
Start with a clean and moisturized face. Apply your regular moisturizer to create a smooth base. Allow it to absorb fully before proceeding.
Step 2: Apply Concealer
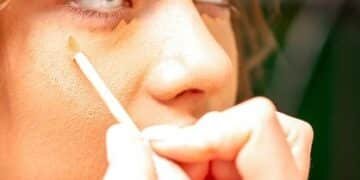
Use a creamy concealer to highlight the areas you want to bake, such as under your eyes, down the bridge of your nose, the center of your forehead, and your chin. Blend well with a damp makeup sponge.
With precision and the right techniques, face baking can become a seamless part of your makeup routine, giving you a camera-ready complexion every time.
- Prep Properly: Cleanse, moisturize, and prime your face.
- Apply Concealer: Use a creamy formula for highlighting.
- Apply Powder Generously: Pack on the translucent powder.
- Bake: Let it sit for 5-10 minutes.
By following these detailed steps, you can achieve a professional-level baked finish that enhances your natural beauty.
Common Mistakes to Avoid When Baking
Baking your face effectively requires attention to detail. Many common mistakes can hinder the process and result in a less-than-perfect finish.
Let’s explore the pitfalls to avoid for a flawless baked complexion.
Using the Wrong Powder
Not all powders are created equal. Avoid using powders that are too shimmery or have a tint, as they can alter the color of your base makeup. Opt for a truly translucent powder.
Baking for Too Long or Too Short
The baking time is crucial. Baking for too short a time won’t allow the powder to set properly, while baking for too long can leave your skin looking dry and cakey. Find the sweet spot for your skin type.

Avoiding these mistakes ensures that face baking enhances your makeup rather than detracting from it, leaving you with a professional, airbrushed finish.
By steering clear of these common errors, you can effortlessly achieve a flawless and long-lasting baked makeup look.
- Wrong Powder: Use a truly translucent setting powder.
- Incorrect Timing: Bake for the right duration.
- Harsh Blending: Use light, circular motions.
- Skipping Moisturizer: Always hydrate beforehand.
Avoiding these errors can make the difference between a professional, polished appearance and a less-than-desirable outcome.
Baking for Different Skin Types
The effectiveness of baking can vary significantly based on skin type. Adjusting your technique to suit your specific skin is essential for optimal results.
Here’s how to customize your baking routine for various skin types.
Dry Skin
If you have dry skin, hydration is key. Use a rich moisturizer and a hydrating primer before applying concealer. Limit the baking time to just 3-5 minutes to avoid further drying out the skin.
Oily Skin
Oily skin types can benefit the most from baking, as the powder helps to absorb excess oil. Bake for a longer period, around 10 minutes, to ensure maximum oil absorption. Use a mattifying primer underneath.
Tailoring your baking routine to your specific skin needs ensures a flawless and comfortable wear, regardless of your skin type.
By adapting your technique to suit your skin type, you can unlock the full potential of face baking for a flawless and personalized finish.
- Dry Skin: Focus on hydration; shorter baking time.
- Oily Skin: Longer baking time; mattifying primer.
- Combination Skin: Target oily areas; hydrate dry areas.
- Sensitive Skin: Use hypoallergenic products; avoid prolonged baking.
Customizing your method to your skin’s unique needs optimizes the finish, ensuring that everyone can reap the benefits of this technique.
Achieving a Natural Baked Look
While baking is known for creating a dramatic effect, you can also achieve a natural, subtly enhanced look. The key is moderation and strategic product selection.
Here’s how to achieve a natural baked finish that enhances your features without looking overdone.
Use a Light Hand
Instead of packing on a heavy layer of powder, use a light hand and apply a thin layer of translucent powder. This will set your makeup without creating a thick, matte finish.
Choose the Right Powder
Opt for a finely milled translucent powder that blends seamlessly into the skin. Avoid powders that are too chalky or have a noticeable white cast.
By mastering these nuances, you can enjoy the benefits of baking without sacrificing a natural-looking complexion.
- Light Application: Use a minimal amount of powder.
- Finely Milled Powder: Look for seamless blending.
- Strategic Placement: Focus on key areas.
- Gentle Blending: Avoid harsh lines.
By applying these principles, you can leverage the benefits of baking for a look that’s polished yet effortlessly natural.
| Key Point | Brief Description |
|---|---|
| ✨ Essential Products | Hydrating moisturizer, creamy concealer, and translucent setting powder. |
| ⏳ Step-by-Step | Prep skin, apply concealer, generously apply powder, bake, and dust off. |
| 🚫 Common Mistakes | Avoid wrong powder, incorrect timing, harsh blending, and skipping moisturizer. |
| 👩💼 Skin Types | Adjust technique for dry, oily, combination, and sensitive skin. |
FAQ
▼
Baking involves applying a thick layer of translucent powder to set concealer, allowing it to sit and “bake” with your body heat, and then dusting it away. This results in a bright, smooth, and long-lasting finish.
▼
The ideal baking time is typically between 5-10 minutes. Adjust the time based on your skin type. Oily skin may benefit from longer baking, while dry skin may need less time to avoid dryness.
▼
Yes, baking can be used on all skin tones. The key is to choose a translucent powder that doesn’t leave a white cast on darker skin tones. Test the powder beforehand to ensure it blends seamlessly.
▼
A creamy, full-coverage concealer works best for baking. It should be one to two shades lighter than your skin tone to help brighten the areas you are highlighting and baking for a more radiant effect.
▼
Baking is more suitable for special occasions or when you need your makeup to last a long time. It may be too heavy for everyday wear. For daily use, consider a lighter setting powder or কৌশল setting spray.
Conclusion
Mastering the art of face baking can undeniably elevate your makeup game, providing a flawless, long-lasting, and photogenic finish. By understanding the essential products, step-by-step techniques, and common pitfalls to avoid, you can customize this technique to suit your unique skin type and aesthetic preferences. Whether you aim for a dramatic transformation or a subtle enhancement, baking offers a versatile approach to achieving a professional, airbrushed look that stands the test of time.


![Achieve a Cat-Eye: 3 Easy Steps for Beginners [2025 Guide] Achieve a Cat-Eye: 3 Easy Steps for Beginners [2025 Guide] - Cover Image](https://buyy-bye.com/wp-content/uploads/2025/05/Buyy-Bye_4_1748517554_f57e1ecb_cover-360x180.jpg)

